Washing machine assemblies are electromechanical devices that move under the influence of current. They work under load and are affected by tap water and temperature fluctuations.
Here’s a list of what can break:
– The electric door latch;
– Filler valve;
– water level sensor;
– THE HEATING ELEMENT;
– temperature sensor;
– electric motor;
– Rotation sensor (“Hall sensor”);
– drum bearings;
– pump;
– electrics (wiring connections);
– gaskets and hoses.
If the machine has functions of drying and steam treatment, then several more items are added: steam generator, air heater, fan, and air temperature sensor.
But the most popular reasons for referrals to service centers are failure of the pump, heating element, flood valve, water level sensor, electrics, and bearings.
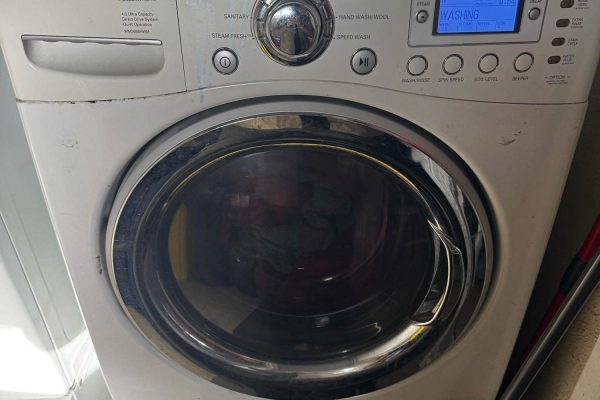
In general, LG washing machines are rather reliable and, in comparison with other popular brands, break down much less frequently.
Replacement of the drain pump according to the rules
The washing machine does not drain the water, the display shows the error code “OE”. It’s simple – it’s the pump, and it is not necessarily broken.
Usually, during draining, you can clearly hear a characteristic sound – the impeller of the pump rotates. You can see it in operation, even without disassembling the machine. To do this you need to open the big round plug – it is in the right bottom corner, under the hatch or on the latches of the plastic panel. Be careful: water will pour out!
Even if the impeller isn’t spinning, it might just be clogged. The first thing to do is drain the water. Near the large round plug, you may find a thin tube covered by a small plug. With a large flat container, gently pull out the tube and open it. And be patient.
Another way to drain the water is to lower the drain hose to floor level. It’s probably secured with clamps on the back wall. When the tank is empty, you can safely open the pump plug and take out anything extraneous you find in there.
It’s possible that all the problems were only due to a clogged drain system. It will need to be cleaned trivially.
If the pump is broken, you will have to disassemble the machine a little:
- Remove the plug from the socket.
- Remove the dispenser. You’ll need to tilt the machine, and there’s usually water left in the dispenser that might spill.
- Remove the bottom plastic panel. It is secured with two self-tapping screws and latches around the perimeter.
- Tilt the machine or put it on the left side (the pump is usually on the right side).
Now you can test the pump with a multimeter and remove it. Even if the electrical circuit is serviceable, the pump may have worn out mechanically. In such cases, the machine does not always agree to drain the water, and the impeller may dangle on its axis.
So, you have diagnosed a faulty pump or are not sure if it works. You can take the appliance to an appliance service to be sure to find out if it’s working properly.
If you are sure that the washing machine pump is faulty – change it, to do this:
- remove the dispenser – there may be water left in it.
- Remove the bottom plastic panel: unscrew the two screws and carefully pick up the edges, starting from the top. It is better to do it with a chisel rather than a screwdriver – there will be less damage.
- Lay the car on its left side.
Wires and hoses are connected to the pump. Wiring terminals are pulled out by hand (don’t forget to mark and photograph them). To remove the hoses, you need to loosen the clamps with your fingers or pliers. When everything is disconnected, unscrew the three self-tapping screws around the filter plug.
You may not be able to find the exact same part on sale. But there are very few varieties of drain pumps, and almost everyone fits dozens of different models of washing machines. It may be easiest to ask for a new part at your nearest service.
Before installing a new pump, clean out any dirt or deposits. They can greatly affect the life of the impeller.
It will be more convenient to bolt the pump with self-tapping screws first, then connect the hoses and wires. Don’t forget to close the plug. Put the machine back in place and run “idle” some of the shortest cycles possible, such as “Rinse and Spin”. After making sure everything is working, you can finally reassemble the machine.
Replacing the water level sensor with your own hands
When the water level sensor fails, the machine draws too much water. It happens that the water is constantly getting in and draining at the same time. Sometimes the breakdown of this sensor is manifested in the poorly wrung-out laundry. The display may show an error code “PE”.
Removing this sensor is not difficult. Unplug, and remove the top cover by unscrewing the two self-tapping screws on the back and sliding it back a bit.
It is secured with one self-tapping screw. First, disconnect the terminal, then remove the sensor, and finally disconnect the hose from it. To check the water level sensor, you need to blow into it. You will hear a click when the water level sensor is working. Install the new water level sensor in reverse order.
We have appliance repair experts available today! Call a professional Poway Appliance Service Center technician by phone or book your service.
Our service center is open 24/7, so you can easily schedule a convenient repair time. The specialist will arrive at the agreed time, carry out a diagnosis, and, if necessary, offer repairs. If you are willing, your appliance will be repaired directly on-site within 1-2 hours. We provide top-notch service at an affordable price!
Contact us


